


You’ve probably been there: hunched over your sheet music, squinting to make out the notes because the light is just wrong. Too bright, too dim, or worse, creating distracting reflections that make reading your music a chore. The good news is, soft piano lighting is totally achievable and can make a world of difference to your practice and performance sessions. It’s all about creating an environment where you can see clearly without eye strain or annoying glare.
Understanding Glare and Why It Matters
Glare is that blinding, uncomfortable light that bounces off surfaces and makes it hard to see. For piano players, this often comes from overhead lights reflecting off the keys, the music stand, or even the page of your sheet music itself. It’s not just annoying; it can actually hinder your ability to play accurately.
What Exactly is Glare?
Think of glare as uncontrolled light. When light sources are too intense or positioned incorrectly, they can overwhelm your eyes. This is especially problematic with glossy surfaces like piano keys or the paper of your music.
The Impact on Your Eyes
Prolonged exposure to glare can lead to eye strain, headaches, and fatigue. This is the last thing you want when you’re trying to concentrate on complex passages or a long practice session.
How Glare Affects Musical Performance
Beyond physical discomfort, glare can literally obscure notes. A bright reflection might cover a crucial crescendo mark, a dynamic indication, or even entire notes. This can lead to mistakes, frustration, and a generally less enjoyable musical experience. Imagine trying to read a book with a bright light shining directly on the words – it’s the same principle.
The Core Principles of Soft Piano Lighting
So, what makes lighting “soft” and suitable for piano playing? It boils down to a few key ideas: diffuse, directed, and adjustable.
Diffusion: Softening the Light Source
The most effective way to combat glare is by diffusing the light. This means scattering the light so it’s not coming from a single, intense point.
Natural Diffusion
Think of a cloudy day. The light is bright but soft because the clouds act as a natural diffuser. You can mimic this by avoiding direct, harsh lights.
Artificial Diffusion Techniques
This is where lamps and fixtures come in. Lampshades, frosted bulbs, or even a strategically placed sheer curtain can diffuse light. The goal is to spread the light out evenly, reducing harshness.
Directionality: Lighting Where You Need It
Soft light doesn’t mean dim light. It means light that’s focused precisely on your music and your hands, without spilling onto areas where it’s not needed.
Targeting the Music Stand
The primary focus for piano lighting should always be the music stand. This is where you’ll be looking most intensely.
Illuminating Your Hands (Optional but Helpful)
Some pianists also find it beneficial to have a subtle light that illuminates their hands. This can be particularly useful for beginners or when learning new repertoire.
Adjustability: The Key to Personalization
Every pianist and every piano setup is different. What works for one person might not work for another. This is why adjustable lighting is so important.
Flexible Fixtures
Look for lamps with adjustable arms, heads, or dimming capabilities. This allows you to fine-tune the light’s position and intensity.
Creating Layers of Light
Instead of relying on one harsh overhead light, consider using multiple light sources at different levels. This can create a more balanced and comfortable lighting environment.
Practical Lighting Solutions for Your Piano
Now, let’s get into the nitty-gritty of how to achieve this ideal lighting. It’s not about buying the most expensive fixtures; it’s about smart choices.
The Humble Desk Lamp: A Versatile Champion
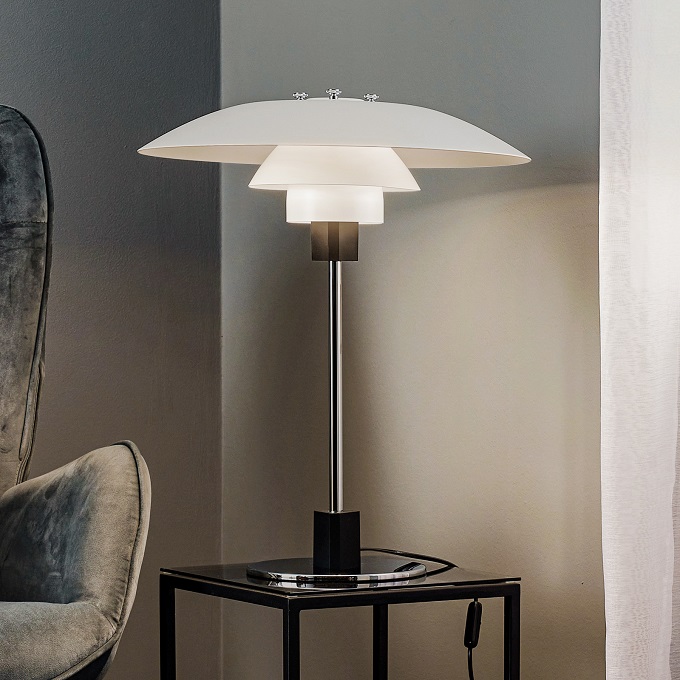
Don’t underestimate the power of a good desk lamp. They are often highly adjustable and can be positioned precisely where you need them.
Choosing the Right Desk Lamp
Look for lamps with a flexible gooseneck or articulated arm. These allow you to bend and angle the light exactly where you want it. A wider shade can also help diffuse the light.
Positioning is Everything
Place the desk lamp so it shines directly onto your music stand from a position that minimizes shadows and glare. Often, this means placing it slightly behind or to the side of the music stand, angled downwards. Experiment to find the sweet spot.
Bulb Choice Matters
Opt for LED bulbs. They are energy-efficient, last a long time, and you can often find them in various color temperatures (warm white is usually best for this application). Avoid bulbs that generate a lot of heat.
Floor Lamps: For a Broader, Softer Glow
Floor lamps can be excellent for providing ambient light that complements a focused music lamp, or for situations where a desk lamp isn’t feasible.
The Torchiere Lamp
A torchiere lamp, which directs light upwards to the ceiling, creates a diffused, indirect light that can be very pleasing. It won’t directly illuminate your music, but it can reduce the contrast between your sheet music and the surrounding room.
Floor Lamps with Adjustable Arms
Similar to desk lamps, some floor lamps come with articulating arms, allowing you to direct the light more precisely onto your music stand.
Placement Strategies for Floor Lamps
If using a torchiere, place it a few feet away from the piano. If using an adjustable floor lamp, position it so the light falls on the music stand without shining directly into your eyes or creating glare on the keys.
Overhead Lighting: The Potential Pitfall and How to Manage It
Overhead lighting is often the default in many rooms, but it can be the biggest culprit for glare.
The Challenge of Direct Overhead Lights
A single, bright overhead bulb shining directly down can create harsh reflections on your music and keys, especially if it’s positioned directly above the piano.
Diffusing Overhead Lights
If you have a ceiling fixture, consider using a dimmer switch. This allows you to reduce the intensity of the light. You can also replace the bulb with a frosted or diffused one. If the fixture itself is open, a lampshade or diffuser attachment can help.
Strategic Room Lighting
Sometimes, the solution isn’t about the light directly over the piano, but the ambient light in the room. Softer, indirect lighting in the rest of the room can make the focused light on your music feel less stark.
Light Temperature and Color: Creating the Right Mood
Beyond brightness and direction, the “color” of your light matters too.
Warm vs. Cool Light
This refers to the color temperature of the bulb, measured in Kelvin.
Warm White (2700K – 3000K)
This is the type of light that’s similar to incandescent bulbs and has a yellowish hue. It’s generally considered more relaxing and cozy, making it a good choice for piano lighting, as it can reduce eye strain.
Cool White (4000K – 5000K)
This light is bluer and more akin to daylight. While it can be good for tasks that require sharp focus, it can also feel stark and increase glare on reflective surfaces. It’s generally less ideal for extended piano practice.
The Importance of Color Rendering Index (CRI)
CRI measures how accurately a light source reveals the true colors of objects.
What CRI Means for Your Sheet Music
A higher CRI means colors are more faithfully represented. This is important for distinguishing between different inks or notations on your sheet music, especially if it’s old or has subtle markings. Aim for a CRI of 80 or higher.
Creating Your Ideal Lighting Setup: A Step-by-Step Approach
Let’s put it all together. Here’s a practical way to approach setting up your piano lighting.
Step 1: Assess Your Current Lighting
Take a good look at how your piano is lit right now.
Identify Glare Sources
Play a few scales or a familiar piece. Where is the light reflecting most annoyingly? Is it from a window, a ceiling light, or a lamp?
Note the Overall Brightness
Is the room too dark? Too bright? Does the light feel harsh or pleasant?
Step 2: Consider Your Piano and Music Stand
The specifics of your instrument and its accessories play a role.
Piano Finish
Glossy black pianos are notorious for reflecting light. This means you’ll need to be extra mindful of light placement. Satin or matte finishes are less prone to glare.
Music Stand Type
A solid music stand can create shadows if not lit correctly. A mesh or slatted stand might allow some light to pass through, which can be beneficial.
Step 3: Experiment with Desk or Floor Lamps
This is where you’ll likely make the biggest improvements.
Start with One Adjustable Lamp
Position it to shine directly on your music stand. Move it around, adjust the angle, and see what feels best.
Try Different Bulb Types
If you have dimmable options, experiment with different brightness levels. Try out a warm white LED bulb if you’re not already using one.
Step 4: Address Overhead and Ambient Lighting
Once your primary music light is sorted, look at the rest of the room.
Dimming is Your Friend
If you have overhead lights, use a dimmer. This is often the easiest way to control harshness.
Introduce Indirect Light
Consider adding a small, diffused lamp in a corner of the room to create a softer, more even overall illumination.
Step 5: Get Feedback (From Yourself!)
Your eyes are the best judges.
Practice in Different Light Conditions
Play for extended periods. Does your lighting cause fatigue? Do you still find yourself squinting?
Make Small Adjustments
Don’t try to do everything at once. Make small changes, play, and then adjust again if needed. It’s an iterative process.
Advanced Tips for the Discerning Pianist
Once you’ve got the basics down, there are always ways to refine your setup.
Smart Lighting Systems
For those who are tech-inclined, smart bulbs and lighting systems offer incredible control.
Programmable Settings
You can often set schedules for your lights or even control them with voice commands. Imagine lights that automatically adjust to a softer setting as evening approaches.
Color Temperature Control
Many smart bulbs allow you to adjust the color temperature throughout the day, mimicking natural light patterns.
Using Natural Light Wisely
Natural light is often the best, but it needs to be managed.
Positioning Your Piano
If possible, position your piano so it doesn’t directly face a bright window, which can cause glare. Side lighting from a window is usually more manageable.
Blackout Curtains or Blinds
These are essential for controlling intense sunlight during practice sessions, especially during the day. They allow you to use natural light when it’s soft and diffuse it when it’s too strong.
The “Dark Room” Technique: Minimalist Approach
Some musicians prefer a very minimalist approach, focusing light solely on the music.
Single Focused Spot
This involves using a highly directional, low-intensity light source that illuminates only the sheet music, leaving the rest of the room in relative darkness. This can be very effective for eliminating distractions.
Ensuring Sufficient Contrast
The key here is to ensure enough contrast between the music and the surrounding darkness so your eyes don’t strain trying to adapt. This often requires a very precisely aimed light.
Ultimately, achieving glare-free, soft piano lighting is about understanding your needs and making deliberate choices. It’s about creating an environment that supports your musical journey, rather than hindering it. With a few adjustments, you’ll find your music reading becomes smoother, your practice sessions more enjoyable, and your eyes will thank you for it.